How to Increase Image Resolution in Adobe Photoshop?

How to Increase Image Resolution in Adobe Photoshop?
-
Clipping Web House
- April 28, 2022
- 4:45 am
What Is Image Resolution?
Resolution is a measure used to describe the sharpness and clarity of an image or picture . It is often used as a metric for judging the quality of monitors, printers, digital images and various other hardware and software technologies.
In simple words, Resolution is the number of pixels in dimensions of height and width.
High resolution provides you with more detail and better picture quality. This implies you can print bigger. The outcome will be smooth, with constant tones and a variety of advances. However, it typically brings about a bigger document size.
The resolution of an image is measured in DPI (dots per inch) or PPI (pixels per inch).
How to Increase Image Resolution in Photoshop
It is easy to increase or decrease image resolution in Adobe Photoshop. Let me take you through the step by step process.
Step 01: Open your image in photoshop.
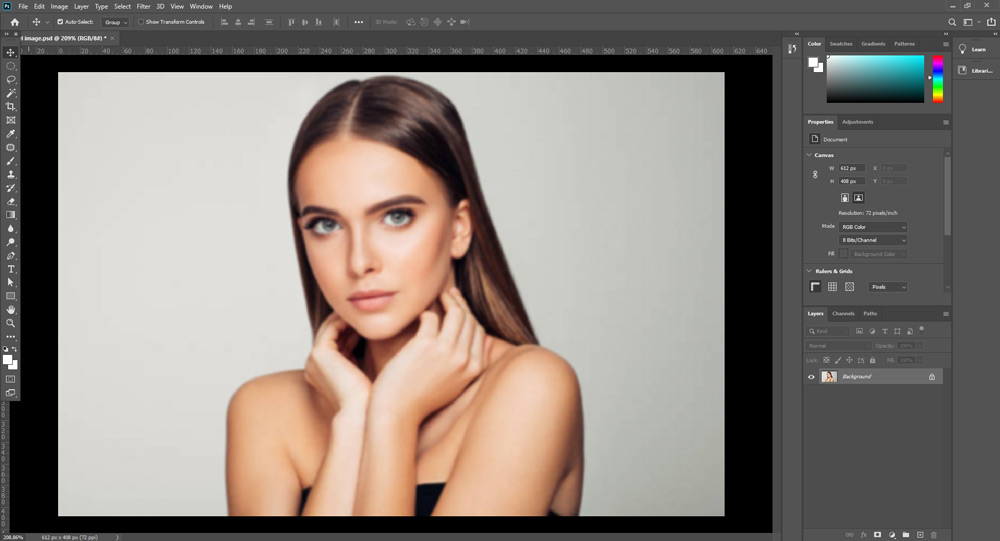
Step 02: From the menu bar click on Image -> Image Size.
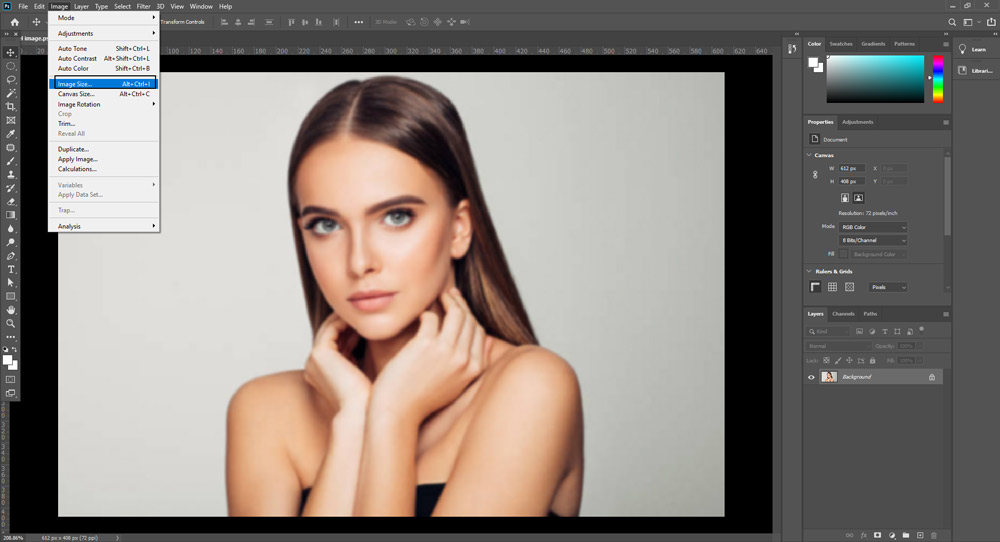
Then you see the image size dropdown all option.
Our Services

Clipping Path

Image Masking

Amazon Image Editing

Color Optimization

Ghost Mannequine

Image Retouching
Recent Post
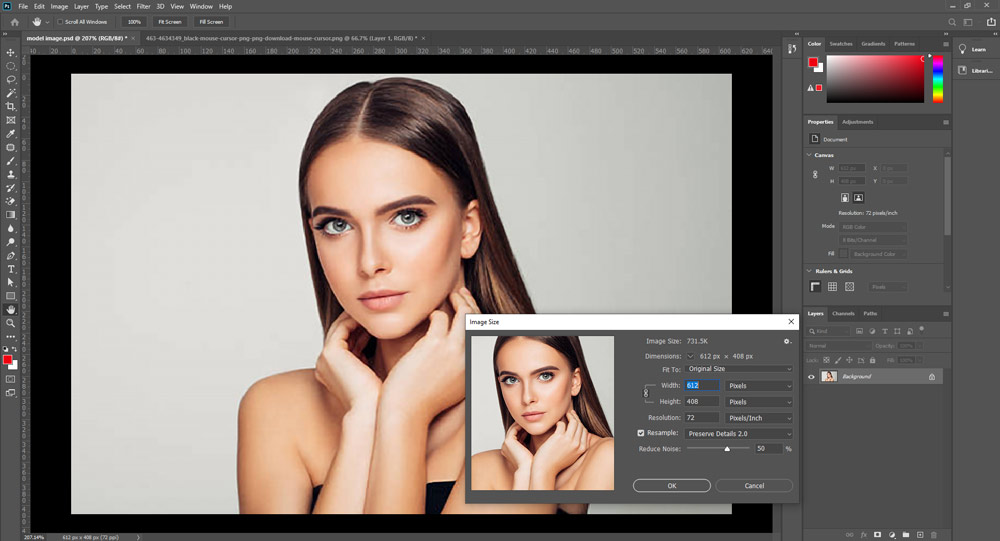
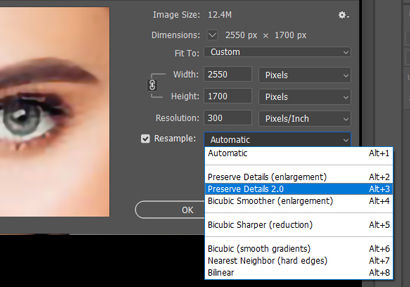
Step 03: From the image size bar change Resolution 72 to 300 also change Resample, Automatic to Preserve Details 2.0, like the below image.
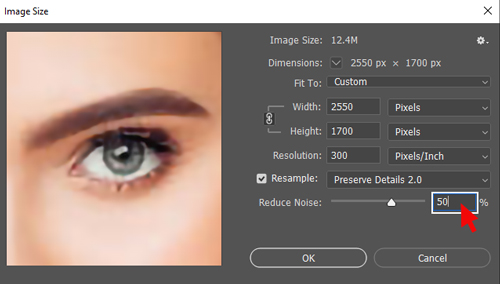
Step 04: When you change the Resolution and Resample option “Preserve Details” then come to set on Reduce Noise 50% and press ok.
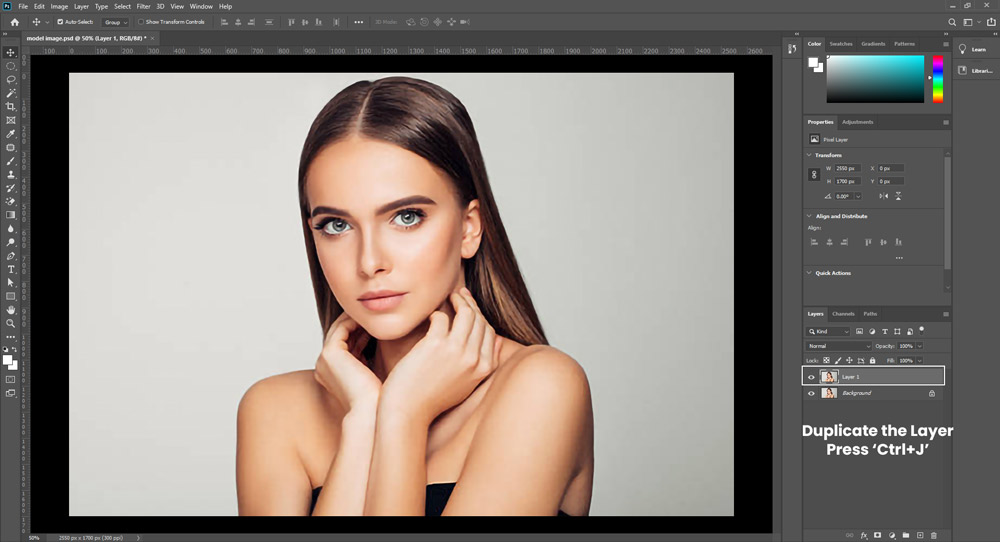
Step 05: After all the options are set. Now, duplicate the background layer press “Ctrl+J”
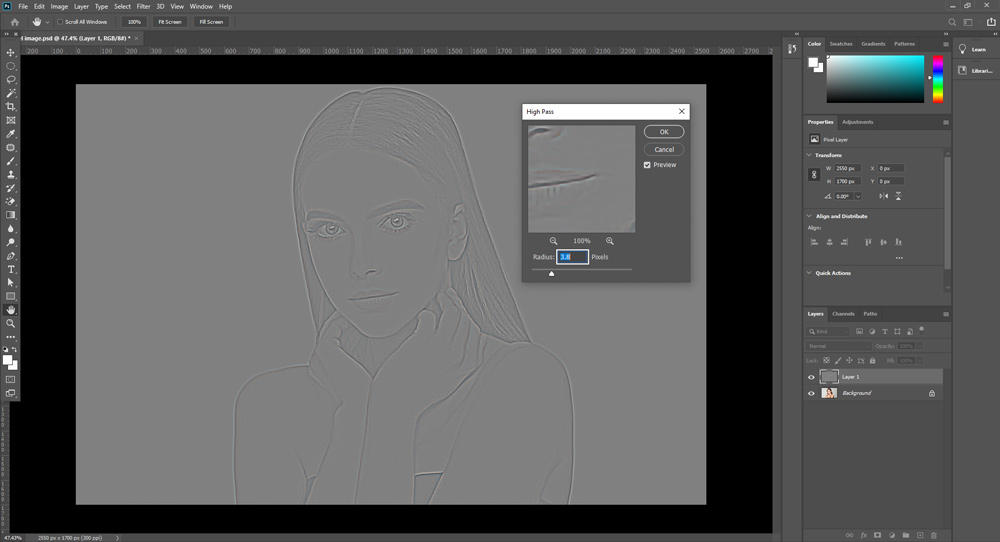
Step 06: In this step, from the menu bar, you can click on Filter -> Other -> High Pass..
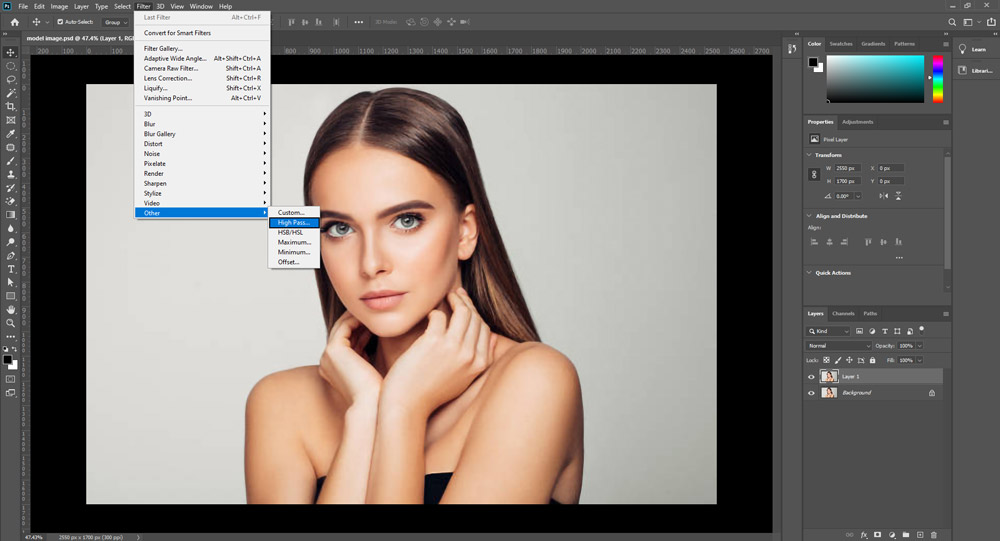
Step 07: Then, you see the this kind of drop down option. Here, set the Radius 3.8 pixels. Then press ok.
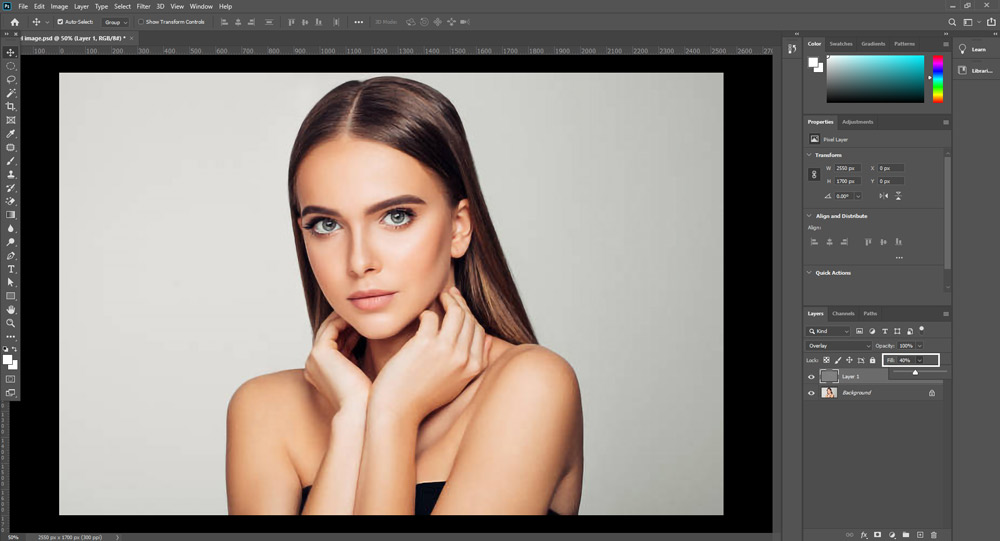
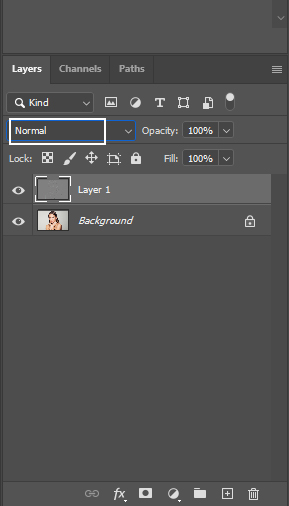
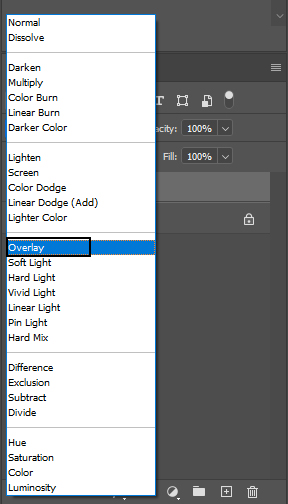
Step 08: Change the layer style Normal to ‘’Overlay’’
Last Step: Finally, Set the ‘Fill’ as you need, we set it to 40% and we recommend 40-50% is perfect. And see the final view of increased Image resolution.
